Although stick welding ensures an easy-peasy setup and requires low equipment cost, you may get into trouble when it comes to stick welding roll cages.
But relax, as I’ll make the whole task a breeze through a step-by-step guide. Here, I’ll also disclose the safety check and many more things you’re searching for!
What Kind of Steel Is Used for Roll Cages?

Roll cages require to be specially manufactured to ensure optimal protection to their occupants against injuries or severe accidents. In this case, they need to be sturdier enough to withstand those issues.
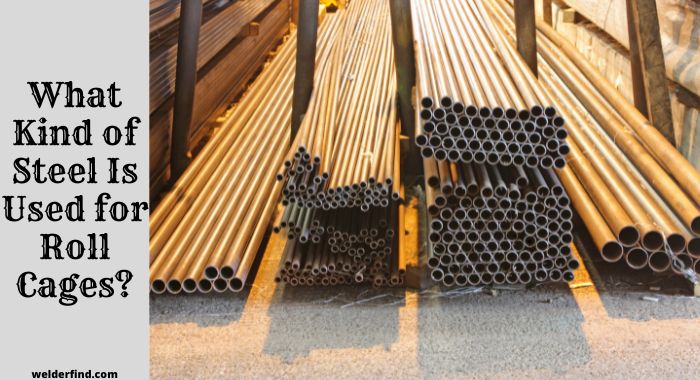
A number of steel materials are available for the roll cage. Cold Drawn Steel (CDS), steel tubing, Chromoly steel, and T45 mild steel are some of the most reliable choices.
Can You Stick Weld A Roll Cage?
Welding a roll cage, welders often use TIG, MIG, and some other welding methods. But what if you try stick welding to build a solid roll cage for your car?
Yes, you’re allowed to stick weld a roll cage, although it isn’t the safest or preferred method. On top of that, it’ll require extra skills and effort to get the work done.
How to Stick Weld a Roll Cage (Step by Step)
On account of the low equipment cost, many of you may want to stick weld a roll cage. Right? No matter what, I’m here going to share some instructions you may follow thoroughly:
Step-1: Taking the Measurement
Before you jump into welding, measuring each essential part is a must. For this task, I’d like to use a measuring tape. Feel free to take assistance from your neighbor or friend while taking the following measurement:
- Your car’s height: from roof to floor
- Your car’s width: from one side to another
- Roof’s width: from roof to the roof bar
- Your car’s center part: from side to roof
Alongside those crucial parts, take an approximate measurement of the seat, rear brace, door brace, and base plates.
Step-2: Determining the Design
Here, you need to be smart enough to get the right design for your roll cage. For this, consider the structure of the cage gets a sturdy frame as it is the main component. Alongside that, choose the right bent tube, triangles, gussets, and kicker bars.
Don’t forget to add extra padding right into the roll cage using foam. Thus, you can ensure both comfort and aesthetic of the cage.
Step-3: Bending Roller Cage’s Tubes
Depending on the tube bender you get yourself, make sure to bend the tube following the right directions. Use a particular lubricant for bending purposes. Feel free to use any coconut oil if you don’t have it.
By utilizing it, you can extend the longevity of your tools. Don’t forget to look for the cleanliness of the bend, and use scrap metal if required.
Step-4: Cutting the Tubes Thoroughly
In order to eliminate the weaknesses of weld joints, using a tube notches is always a good option. This will really come in handy for accurate notching, resulting in a tight and perfectly-fitted tube.
Following some specific rules may require the weld/notch gap. For instance, I’ve found that SFI defined the ideal gaps between welding joints and notch.
This can be specified by considering the filler rod’s diameter utilized on welding joints.
Step-5: Start Welding
Let’s begin the real action right away. As you’re going to use stick weld, you’ll have to be extra careful and skilled to get the task done. For the welding procedure, rely on either Chromoly steel or T45 mild steel.
Note that you can do TIG, MIG, or even stick-weld mild steel. The primary benefit of using it is to reduce the welding cost as much as possible.
Be sure you’ve adjusted the tubes perfectly to each other before you begin stick welding. If everything seems to be fine, start welding carefully.
Step-6: Time for an Observation
You must penetrate the filler rods thoroughly over the roller cage’s joints to ensure the strongest bond.
After completing it, don’t try to clean them up using a grinder because this may turn your roller cage joints fragile or weaker.
Safety Check (How to Pass Roll Cage Requirements before the Race Begin)
Even when you pass your time with frustration, you can have fun and joy manufacturing your own car roll cage.
Following the right guide, collecting the necessary gear, and making the best use of stick welding is mandatory!
For safety check, it doesn’t matter which procedure of welding you’re going to apply to use the roll cage, considering the following things is more necessary –
- The welds you used must have perfect penetration.
- Confirm that you generated a decent amount of welds.
- Welds must be free from any deformities or defects.
Last Words
Frankly speaking, a stick welding roll cage isn’t the safest and best choice for beginners. However, I tried my level best to share the most basic and easiest steps, allowing you to perform the task without much effort.
Once you’ve done welding, don’t forget to look for the safety check as a precaution!
Frequently Asked Questions (F.A.Q):
Is it good to have a roll cage in your car?
Of course, it is. In fact, a roll cage allows you to stay protected against injuries during fast driving.
Will a roll cage protect you in a crash?
Yes, it assists in protecting you from the outer elements, especially when you end up with a “top-speed crash.”
Can you TIG weld the roll cage?
Definitely, you can. Even TIG well is one of the safest and most reliable choices, producing an even better result.
Also check
